
How to Use Data Validation Excel: Easy Step-by-Step Guide
Understanding Excel Data Validation Fundamentals
Data Validation in Excel acts like a gatekeeper for your spreadsheet. It checks each entry so only the right type of data passes through, keeping records accurate and consistent. Imagine tracking sales figures and someone types letters instead of numbers—validation stops that mistake by only accepting numerical data. This safeguard saves time and cuts down on costly corrections.
As your data quality guardian, validation rules help maintain integrity even when multiple users update the same file. By setting clear parameters in advance, you prevent errors before they happen and preserve reliable results. Validation isn’t just restrictive—it guides users, turning data entry into a smoother experience. When prompts and alerts appear at the right moment, they feel more like helpful suggestions than barriers.
Common Data Validation Types And Their Uses
The table below compares the main data validation types available in Excel and shows where each one shines.
Common Data Validation Types and Their Uses
Comparison of different data validation types available in Excel and their practical applications
| Validation Type | Purpose | Example Use Case | Best For |
|---|---|---|---|
| Whole Number | Restricts input to whole numbers within a specified range. | Limiting order quantities to be between 1 and 100. | Numerical data with specific limits |
| Decimal | Allows decimal numbers within a defined range. | Tracking product prices or weights. | Precise numerical values |
| Date | Restricts input to valid dates within a specific range. | Recording project deadlines or employee start dates. | Time-sensitive information |
| Text Length | Limits the number of characters entered. | Standardizing product codes or customer IDs. | Maintaining data consistency |
| List | Restricts input to a predefined list of options. | Creating dropdown menus for departments or product categories. | Categorical data |
| Custom Formula | Uses a formula to create complex validation rules. | Validating data based on conditions in other cells. | Advanced validation scenarios |
Choosing the right validation type helps you enforce clear rules and maintain accurate records. Whether you need simple numerical limits or a custom formula, data validation safeguards your spreadsheet against invalid entries. Use this guide to streamline data entry and boost confidence in your results.
With 0.5 to 1.5 billion users relying on Excel worldwide, mastering these validation tools is a smart investment. Discover more insights about data validation.
Why Data Validation Matters
Imagine managing inventory in Excel without any safeguards. An employee might accidentally enter a -5 for product quantity, skewing stock reports and risking supply issues. With data validation in place, the system blocks invalid inputs, so your inventory counts stay reliable. This proactive check ensures every figure aligns with reality.
Reliable data underpins clear analysis and trustworthy reporting. Data validation enforces consistency, leading to sharper insights and better-informed decisions. When you define rules up front, your team spends less time fixing mistakes and more time acting on results.
Explore How to Master Data Scrubbing Techniques for methods to keep your datasets spotless.
Building Your First Data Validation Rules That Actually Work
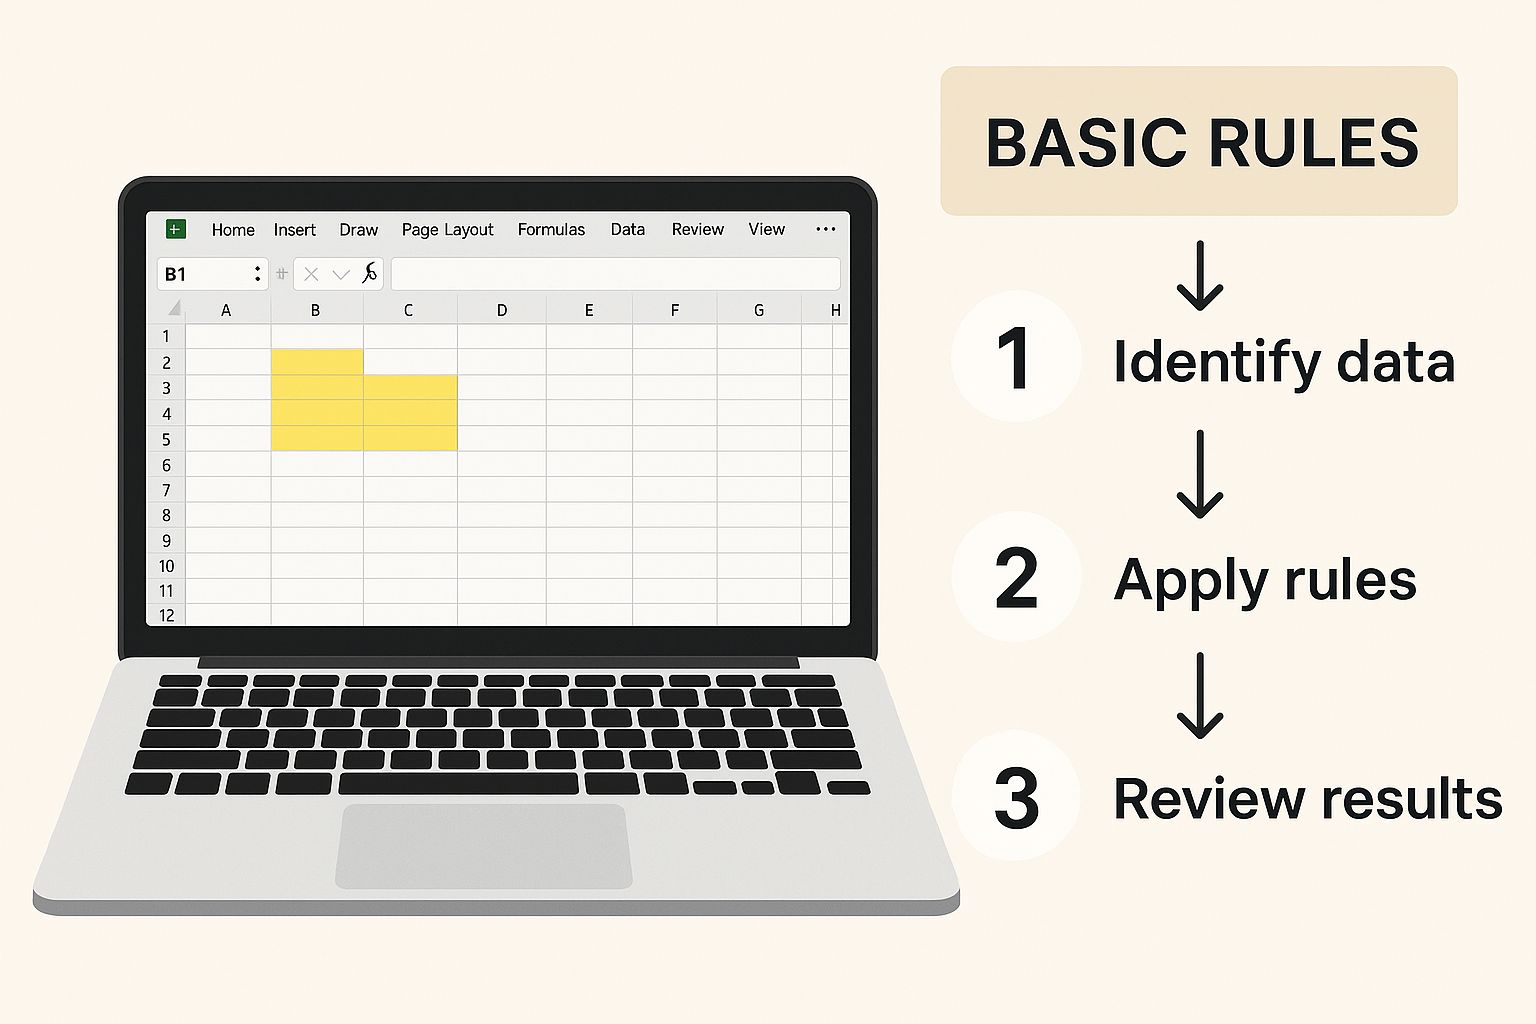
The infographic above shows an Excel worksheet with highlighted cells and a "Basic Rules" section. It visualizes how to set up basic data validation, making it clear how simple it is to implement these powerful controls.
Let's explore the Data Validation dialog box, your central hub for establishing rules. Begin by selecting the cell or range where you want the validation to apply. Then, go to the Data tab on the Excel ribbon and click the Data Validation button. This will open the dialog box. The "Settings" tab allows you to define your validation criteria, such as whole numbers, dates, text length, or even a custom formula.
Setting Criteria and Input Messages
Imagine you’re tracking budgets. You could select "Whole number" and set minimum and maximum values to keep entries within budget limits. You can also create an input message that appears when a user selects the cell. This provides clear instructions, such as "Enter a value between 0 and 1000," guiding users and reducing errors.
Even with input messages, mistakes happen. That's where error alerts are valuable. These appear when someone enters invalid data. There are three types: Stop, Warning, and Information. Stop prevents invalid entries entirely. Warning and Information allow users to override the rule if needed. A Stop alert on a required date field, for example, could prevent submissions without a date.
Data accuracy in Excel is crucial. Studies show that two-thirds of office workers use Excel at least once per hour, highlighting the importance of data validation. Find more detailed statistics here. Using these features effectively improves data quality, leading to better decisions and more efficient workflows.
Testing Your Rules
Thorough testing is essential before applying your validation rules. Enter a range of values, both valid and invalid, to confirm they function correctly. For a date field, test dates outside the allowed range, incorrect formats, and blank entries. This also verifies that your input messages and error alerts are clear and helpful.
Working With Lists
Data validation goes beyond basic rules. Create dropdown lists to restrict entries to predefined options, standardizing data entry and reducing typos. Dropdown lists are ideal for categorical data, like departments or product categories, improving data quality and efficiency.
Read also: How to master data transformation with Excel Power Query. This allows you to transform your data powerfully.
By mastering these techniques, you’ll be well-equipped to use data validation effectively. These tools help you build robust and reliable spreadsheets, enabling confident, data-driven decisions.
Creating Dynamic Dropdown Lists That Update Themselves
Standard dropdown lists in Excel are helpful for controlling data entry. But what happens when your options change? Manually updating data validation can be a real chore. Dynamic dropdown lists offer a solution by automatically adapting to your data. As you add or remove items from your source, the lists update, saving you time and ensuring your validation remains current.
Organizing Your Dropdown Data for Dynamic Lists
The key to a dynamic dropdown list is how you organize the source data. Simple ranges work well for smaller lists. However, for larger, frequently changing datasets, named ranges and table references offer more robust options. Naming a range lets you assign a descriptive name to a group of cells, simplifying references in your data validation rules. This is especially helpful when dealing with large spreadsheets.
Table references are even more powerful. Converting your dropdown data into an Excel Table allows the dynamic list to expand automatically as you add new rows. This eliminates the need for manual adjustments to your data validation. This “set it and forget it” method makes your spreadsheets adaptable and simplifies data entry.
Creating User-Friendly Dynamic Dropdown Lists
Functionality is important, but so is usability. Organize your dropdown lists logically. Alphabetical order is often effective, but consider grouping options by category for improved clarity. For complex datasets, add helpful descriptions to each item. For example, if you have product codes in your dropdown, include a short product name next to the code. This small improvement can significantly speed up data entry.
Consider using the INDIRECT function in Excel. This advanced feature creates more flexible and powerful dynamic lists. You can link data validation to a cell containing the name of another range or table, further automating updates. Advanced data validation techniques also include the use of the INDIRECT function, which allows for dynamic dropdown lists and custom formulas. This feature enables users to create dependent dropdowns, where the options in one dropdown rely on the selection made in another.
This functionality is invaluable for complex data management. For organizations relying heavily on Excel for data management, mastering these advanced techniques significantly improves data accuracy and efficiency. Learn more about these techniques here.
Best Practices and Examples
Here's a simple example. Imagine a list of regions in a table named "Regions." To create a dynamic dropdown based on this table, in the Data Validation dialog box, select "List" as the Allow setting. Then, enter the formula =Regions in the Source field. Now, new regions added to the "Regions" table will automatically appear in the dropdown.
By using these techniques, your spreadsheets become powerful tools for accurate and efficient data management. Dynamic lists reduce errors and make data entry faster and more user-friendly for your entire team. Regularly review and update your source data to ensure its accuracy and relevance. Documenting your dynamic lists within your spreadsheet helps others (and your future self) understand how they work, ensuring maintainability over time.
Mastering Advanced Validation With Custom Formulas
Dynamic dropdown lists are helpful, but custom formulas truly unlock the power of data validation in Microsoft Excel. These formulas let you create sophisticated, business-specific rules that go beyond basic settings. This section explains formula-based validation with practical, real-world examples.
Validating Data Based on Other Cells
Custom formulas allow you to create validation rules based on values in other cells. For example, you might want a project's end date to always be after its start date. This conditional validation gives you powerful control over data entry, ensuring consistency and preventing errors.
This approach ensures data integrity across your spreadsheet. By linking validation rules, you can prevent illogical entries and maintain accurate relationships between different data points.
Creating Rules With Multiple Criteria
Sometimes, validation requires more than one condition. Imagine an order discount only valid if the order quantity exceeds a certain limit and the customer is a preferred member. Custom formulas let you combine criteria using logical functions like AND, OR, and NOT for highly specific validation rules.
Interestingly, breaking complex tasks into smaller parts can boost productivity. One study showed researchers using this method were 72% more likely to finish their work on time. Read the full research here.
Using INDIRECT for Dependent Dropdown Lists
Custom formulas, combined with the INDIRECT function, enable dependent dropdown lists. These lists change based on selections in other dropdowns. For example, choosing a "Country" from one dropdown could populate a second dropdown with the relevant "Cities". This makes data entry streamlined and user-friendly.
This dynamic approach improves data entry efficiency and minimizes the risk of selecting invalid combinations. It provides a clear and intuitive user experience.
Troubleshooting Formula-Based Validation
While powerful, custom formulas can be tricky. Here are troubleshooting tips:
- Double-check your formula syntax: Ensure correct parentheses, commas, and function names.
- Test with different values: Input valid and invalid data to confirm the formula works.
- Use the Evaluate Formula tool: This Excel tool helps pinpoint errors by stepping through the formula calculation.
Following these steps can help you identify and fix formula errors quickly, saving you time and frustration.
Examples of Custom Formulas in Action
Here’s a quick example. To ensure a cell's value exceeds the value in cell A1, use the custom formula =A2>A1 in cell A2's data validation settings.
You might also find advanced filters useful: How to master advanced filters in Excel. Advanced filters extract specific data from large datasets. This complements data validation by ensuring clean data input and flexible data output.
Mastering custom formulas elevates your data validation skills, enabling you to create rules perfectly suited to your needs within Excel. These formulas make your spreadsheets powerful tools for accurate and efficient data management.
Crafting User-Friendly Messages That Guide and Protect

Effective data validation in Excel isn't just about setting the right rules; it's about communicating clearly with your users. This means crafting helpful messages that guide users toward correct entries before mistakes happen, and providing specific, actionable feedback after an invalid entry. This approach improves data quality and creates a smoother, more positive user experience.
Input Messages: Guiding Users Proactively
Input messages appear when a user selects a cell with data validation. They serve as gentle reminders, providing context and instructions before any data is entered. For example, if a cell requires a date in a specific format, your input message could be, "Please enter the date as MM/DD/YYYY." This proactive guidance minimizes errors from the start.
Keep input messages concise and focused on essential information. Avoid overwhelming users with lengthy explanations. Instead, provide clear, actionable instructions that are easy to understand at a glance. This maintains a smooth workflow and prevents users from ignoring the messages.
Error Alerts: Providing Useful Feedback
When an invalid entry occurs, error alerts offer feedback and explain how to fix the mistake. Instead of a generic "Invalid entry" message, tailor your alerts to offer specific guidance. For instance, if a user enters text in a number-only field, your alert could say, "This cell requires a number. Please enter a numerical value." This targeted feedback helps users understand why their entry was invalid and how to correct it.
Choosing the Right Error Alert Type
Excel offers three types of error alerts: Stop, Warning, and Information. The "Stop" alert completely prevents invalid entries, ensuring strict adherence to the validation rules. The "Warning" and "Information" alerts allow users to override the rule if necessary, but with varying levels of emphasis. A "Warning" presents a stronger caution, while "Information" gives a gentler notification.
Choosing the right type depends on the data and the consequences of invalid entries. For critical data where accuracy is paramount, a "Stop" alert is usually best. For less critical data, "Warning" or "Information" might offer more flexibility. For more tips on data cleaning, check out this helpful resource: How to master easy data cleaning tips.
The following table summarizes common data validation issues and provides solutions for addressing them:
Common Data Validation Issues and Solutions
This table provides a quick reference guide for diagnosing and fixing the most frequent data validation problems.
| Problem | Symptoms | Likely Cause | Solution |
|---|---|---|---|
| Incorrect Data Type | Value entered is not the expected type (e.g., text in a number field) | User error or misunderstanding of instructions | Use an input message to clarify the required data type and an error alert to guide correction. |
| Out-of-Range Value | Value is outside the allowed range (e.g., a date outside a specified period) | User error or incorrect validation rule | Check the validation rule and use input messages to specify the allowed range. |
| Invalid Format | Value is not in the correct format (e.g., an incorrectly formatted date) | User error or unclear instructions | Provide a clear example of the required format in the input message. |
| Inconsistent Data | Value conflicts with data in other cells | Data entry error or logical inconsistency | Use a "Stop" alert to prevent inconsistencies and review the data validation rules. |
By understanding these common issues and their solutions, you can build more robust and user-friendly spreadsheets.
Maintaining a Professional Tone
Even with error messages, maintain a professional and helpful tone. Avoid accusatory language or condescending remarks. Phrase messages positively, focusing on the desired action. For example, instead of "Incorrect entry," try "Please enter a value between 1 and 100." This small difference significantly improves the user experience.
Testing Your Messages With Real Users
Testing with real users is the best way to ensure your messages are clear and effective. Observe how users interact with the data validation. Note any confusion or difficulties and refine your messages based on their feedback. This user-centered approach ensures your data validation is both robust and user-friendly. Testing with diverse users can reveal unexpected issues and improve usability. This iterative process ensures your rules and messages work seamlessly for everyone. Involving users in testing creates ownership and improves acceptance of the data validation rules, minimizing resistance and ensuring smooth data entry.
Key Takeaways
Your journey to mastering data validation in Excel goes beyond simply setting up basic rules. True mastery involves understanding the complete process: planning, documenting, testing, and maintaining your validation strategies. This section offers a practical guide, drawing from the experience of Excel professionals who use these techniques daily to tackle real-world challenges.
Planning Your Validation Strategy
Before you even open the Data Validation dialog box, take some time to plan. Think about the purpose of your spreadsheet. What type of data will it contain? Who will be using it? Identifying potential errors early on saves you time and effort later. For example, if you’re creating a spreadsheet to track sales, anticipate common mistakes like incorrect date formats, negative values, or duplicate entries. Addressing these issues proactively builds a more robust and reliable spreadsheet.
Documenting Your Validation Rules
Documentation is essential for future reference. As spreadsheets grow and change, it's easy to forget the reasoning behind specific validation rules. Creating a simple document, or even adding comments directly within the spreadsheet explaining your validation criteria, saves time and prevents confusion in the long run. This documentation becomes invaluable when troubleshooting or updating your spreadsheet, especially in collaborative environments.
Testing Complex Validation Rules
After implementing complex validation rules, particularly those using custom formulas, thorough testing is crucial. Don't just test with valid data; use invalid data, boundary conditions, and edge cases to ensure your rules work as expected in every scenario. This comprehensive testing helps uncover hidden problems and ensures your data validation remains effective.
Performance Considerations for Large Spreadsheets
Data validation, especially with custom formulas, can sometimes affect performance in large spreadsheets. If you encounter slowdowns, consider optimizing your formulas or exploring alternative methods. For example, instead of applying validation to an entire column, apply it only to the rows requiring data entry. This targeted approach can dramatically improve performance. You might find this helpful: How to master data visualization to present your data insights clearly and effectively.
Accessibility Practices
Make sure your data validation is accessible to everyone, including users with disabilities. Use clear and descriptive input messages and error alerts compatible with screen readers. Also, pay attention to the visual presentation of your validation, using sufficient contrast and clear formatting.
Practical Checklists and Templates
Here are a few checklists and templates to help you get started:
-
Data Validation Planning Checklist:
- Define the spreadsheet's purpose.
- Identify potential data entry errors.
- Determine the appropriate validation rules.
- Plan clear input messages and error alerts.
-
Data Validation Documentation Template:
- Cell/Range:
- Validation Rule:
- Input Message:
- Error Alert:
- Purpose/Explanation:
Maintenance Strategies
Data validation isn't a set-it-and-forget-it task. As your spreadsheet changes, your validation rules should too. Regularly review your criteria to ensure they stay relevant and effective. Update your validation if your data structure changes. This ongoing maintenance keeps your spreadsheets accurate and dependable over time. Consistent reviews help identify outdated or unnecessary rules, further improving performance and preserving data integrity. By integrating these key takeaways into your Excel workflow, you transform data validation from a basic function into a powerful tool for maintaining data quality, accuracy, and efficiency.
Want to showcase your Excel skills even when you're away from your computer? Visit SumproductAddict for Excel-themed apparel and accessories. From fun t-shirts to stylish desk mats, SumproductAddict helps you display your passion for data. Use code FIRST10 for a 10% discount on your first order.